Harley Davidson is one of America’s most renowned motorbikes manufacturers, and how could they possibly not be? Engines produced by the company are yet to be competed by any other.
Not only is the sound of the engine distinguished, but the design is also highly distinctive. These engines’ Pistons are timed to find a particular order in the crankshaft, generating a consistent revolution. Thus, being responsible for the iconic sound that is produced, of course, can only be recognized by bike enthusiasts.
However, the such pleasing composition of a bike also requires adequate care for the bike to remain composed. Any scratch on the exterior of a Harley bike or any problem in its interior can cost the passionate owner a hefty fortune.
Therefore, to eliminate your spending hundreds of dollars on the bike’s repair, we bring you an extensive manual on Harley Front Fender tip light removal.
What is a Harley Front Fender Tip Light Removal?

Bike manufacturers- Harley Davidson- have always assembled their motorbikes keeping in mind the needs of their customers. Customers have always been a top priority, and to assist them, the company locates lights on both the bike’s front and rear fenders.
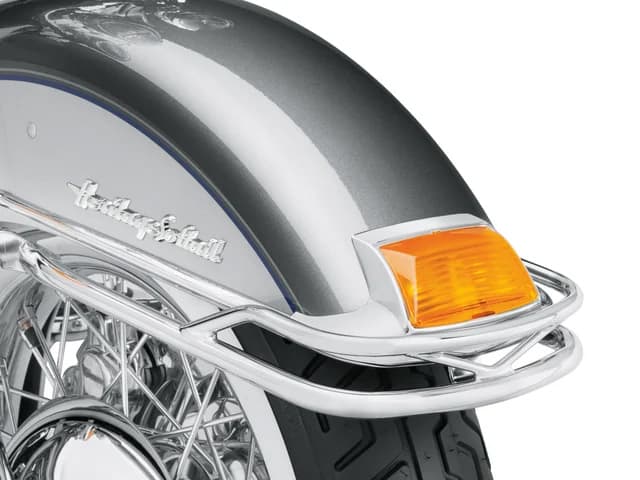
Despite being compact, front fender lights provide bike riders with enough light to have a safe journey. Only when the front fender light has been used for a prolonged period does it dim and eventually stop fulfilling its purpose. It is then that you know precisely that the front fender tip light requires a removal.
Removing the tip light from your front fender is not difficult; however, it is technical and cannot be undertaken with a limited understanding. But, it all becomes straightforward if you know when and where to start working from in the removal process.
Once again, the best part about removing the tip light of the front fender yourself is that you will save up on the money initially given to a mechanic. Alongside, the time that had to be wasted getting the tip light removed from the front fender will instead be utilized to teach you a new skill.
Step-to-step removal of tip light
We expect anyone bearing the responsibility of removing the tip light from the front fender to have minimal knowledge of using the essential tools, if not sufficient. This removal procedure requires you to know how to use a screwdriver diligently.
Tip light removal manual for Harvey model- FLT and older than 1993
Step 1
Use a screwdriver that is small in size so that it can easily fit into the minimal space of the front fender. Then, on the front fender in the center and at the top, insert your screwdriver’s blade rectangularly.
As the fender lamp’s tip is fragile, you must be mindful of moving your screwdriver. Here you must cautiously pry the lens of the light out.
Step 2
Upon close inspection of the front fender, you will encounter a few nuts fastening the lamp to the bike’s front fender.
Gently unscrew the two screws on the sides of the fender lamp’s tip. Next, remove those screws fastening the tip light to the bike’s front fender. After loosening the screws, carefully detach the lamp from its assembly, ensuring that no connected wires are damaged.
Step 3
Three inches apart from the lamp’s assembly will be a wire connector. Slowly unplug the connector.
Once done with all the unplugging, you have successfully removed the tip light from the front fender. Now cover the socket area of the connector, which is connected to the wiring of the motorcycle, using tape (preferably electrical tape) so no damage occurs.
Tip light removal manual for Harvey model- FLT and later than 1994
Step 1
Before you begin disassembling the components of your tip light on the front fender, read the service manual for your FLT. After rigorously reading the manual, remove the head lamp’s assembly and housing.
Step 2
Three connectors inside the lamp (also known as 32 in the provided wiring diagram) connect the 12V and the electrical ground of the light to the fender’s assembly. Therefore, it is integral for you to locate all of them precisely.
- The FLTC Ultra connector is commonly found under the fuse and near the area where there is a circuit breaker block.
- FLHT/C/C-U connector is positioned on the bottom of the left, and the outer fairing bracket
- FLHR connector can be tracked down on the left front side and near the suspension valve
Step 3
To verify that you have successfully located the accurate 32, double-check the wiring colors on the diagram against the wiring color of the connections in front of you. Do this before you disassemble the connector to avoid any further complications.
Unplug all the leads connected with the tip light to the front fender using the service manual. Make sure to plug the leads out of the connector and the socket.
Step 4
Now using a small-sized screwdriver, insert it in the rectangular space above and the center of the fender tip light. Then, gently remove the lens of the lamp.
Step 5
Unscrew the two screws that hold the fender tip light assembly with the front fender. When you have unscrewed all the nuts, then cautiously, without causing any damage to the wires inside the tip lamp, detach the lamp assembly from the light.
Step 6
This step needs to be undertaken with absolute concentration. Then, by reaching under the left side of the front fender, pull all the wires through the rear holes, any clips, and the trip of the front hole.
Conclusion
Our guide on Harley front fender tip light removal has summarised the removal procedures in great detail for all our readers to manage the task efficiently. So not only is there a provided guide for removing the tip light from the front fenders of the latest models, but also for the earliest ones.
All you have to do is religiously abide by all the steps, and it is with utmost certainty that you will succeed in your endeavor!